Cypress
What you’ll learn:
- How to run Cypress tests with webapp.io as part of a CI/CD pipeline
- How to make the filebrowser experience better for your developers
- How to parallelize Cypress test runs within webapp.io
Video Tutorial:
Overview
- Webapp.io + Cypress
- Running Cypress Tests in webapp.io
- Sample App Overview
- Understanding Layerfiles
- Viewing Cypress Results
- Running Tests in Parellel
1. Webapp.io + Cypress:
Cypress is a fast, easy, and reliable end-to-end testing solution for anything that runs in a browser, and webapp.io enables you to review changes to your project within minutes instead of hours. On every commit, webapp.io gives you a customizable full-stack preview environment for your webapp. Leveraging the two together, we can get full-stack review environments that can run our Cypress tests.
2. Running Cypress Tests in webapp.io
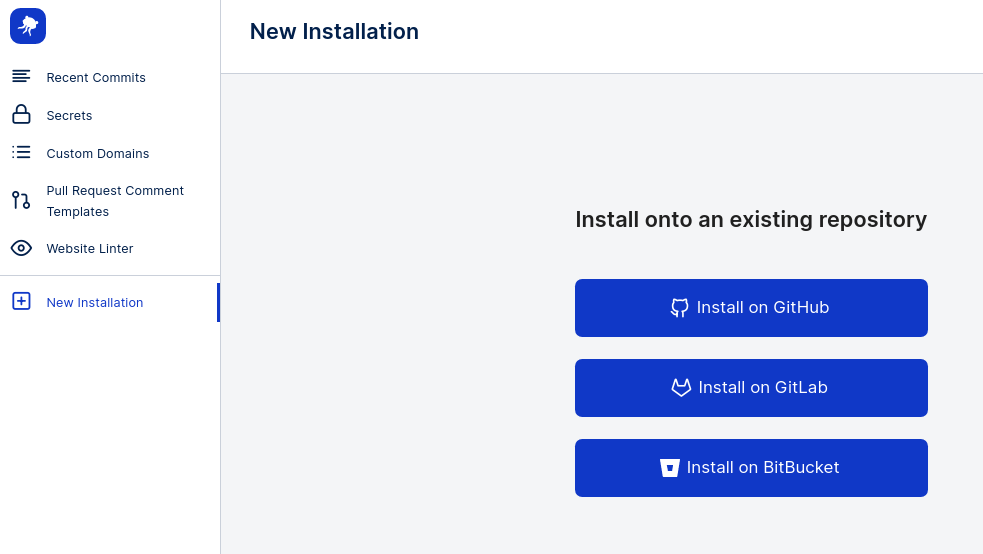
Running Cypress tests in webapp.io is simple with Layerfiles. To run our Cypress tests on a preview environment, we simply need to install webapp.io onto our repository, and push a commit with our Layerfile.
First off, head over to webapp.io to sign-up/sign-in.

Once signed-in, head over to the “New Installation” tab on the dashboard, and follow the prompts to install webapp.io on your repository (GitHub, BitBucket, or GitLab).

After installed, we can click on the “End-to-end tests for a react app” card to get the link to fork the sample repository.

3. Sample App Overview:
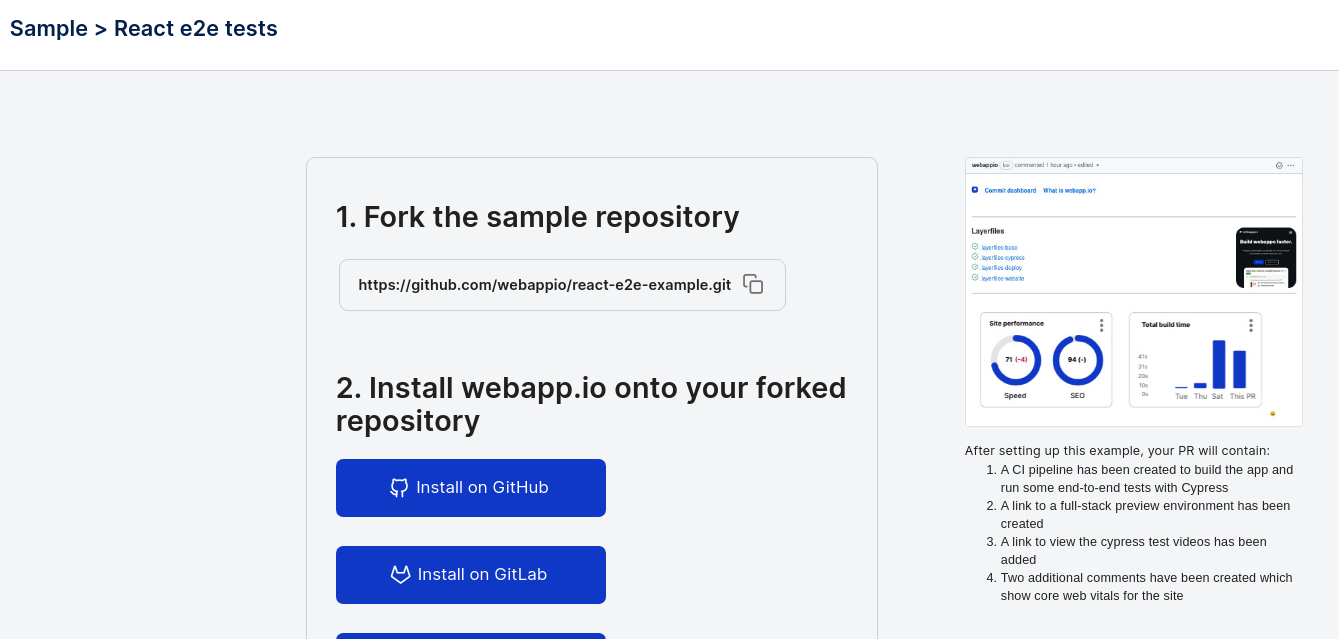
In this tutorial, we’ll go over a sample React app with a Cypress test. The sample React application can be found in the following repository React E2E Example.
To run the application, fork the repository, clone the repository to your local computer,
and run the command npm install
in the root folder to install the project dependencies.
Once installed, we can run npm start
to start the React project.
To view the file defining our Cypress test, we can navigate to react-e2e-example/tests/test_navigation.spec.js
.
The Cypress test in this file checks the links in the React application to ensure
that they all work.
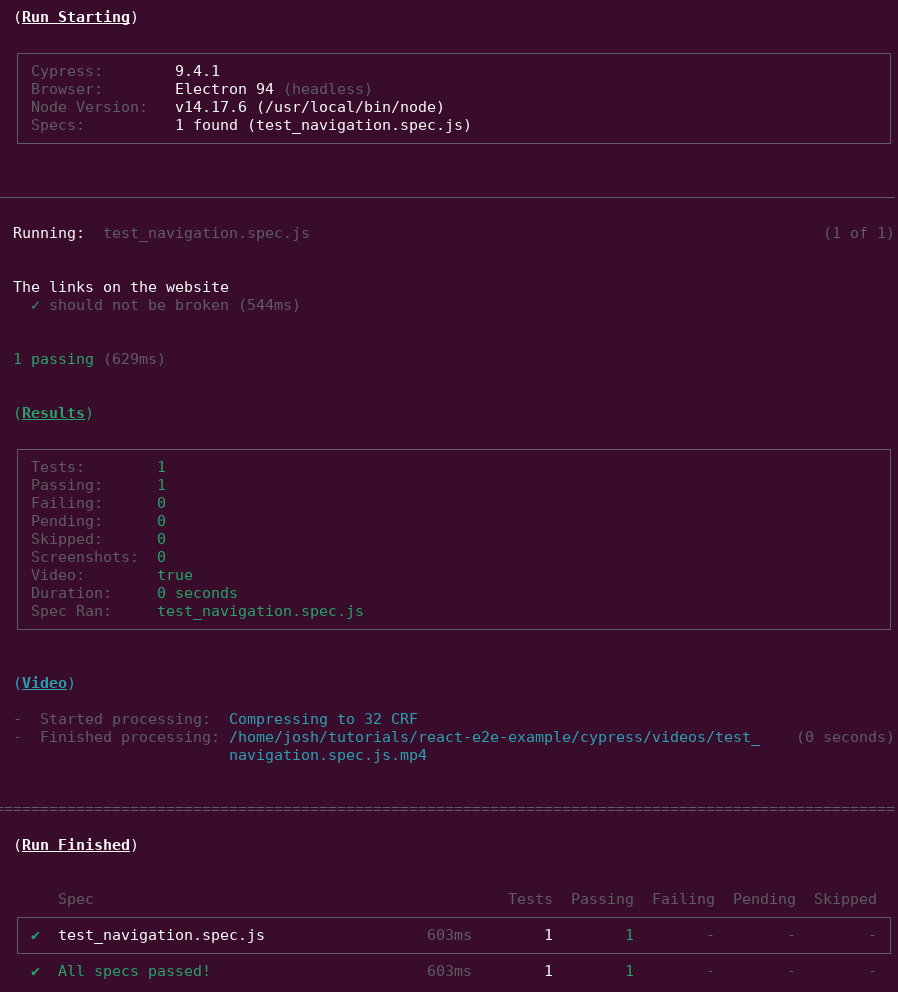
Before running the tests in our preview environment for webapp.io, let’s run it locally in another terminal with the following command:
npx cypress run
We can see the Cypress tests have passed in the terminal.

The next step, is to run this in our preview environment, but first let’s go through the Layerfile.
4. Understanding Layerfiles
In our sample React application we have a file called Layerfile
. Layerfiles
are a set of instructions that tell webapp.io how to build and run your
application as a preview environment. Let’s break down what the existing
Layerfile does.
FROM vm/ubuntu:18.04
# To note: Layerfiles create entire VMs, *not* containers!
RUN curl -fSsL https://deb.nodesource.com/setup_14.x | bash && \
apt-get install nodejs python3 make gcc build-essential \
libgtk2.0-0 libgtk-3-0 libgbm-dev libnotify-dev libgconf-2-4 \
libnss3 libxss1 libasound2 libxtst6 xauth xvfb && \
rm -f /etc/apt/sources.list.d/nodesource.list
# Allocate memory since node is a memory hog
MEMORY 2G
ENV NODE_OPTIONS=--max-old-space-size=8192
COPY . .
RUN mkdir cypress
RUN npm install
RUN BACKGROUND npm start
RUN BACKGROUND cd cypress && python3 -m http.server 8000
RUN npx cypress run
# start a webserver to view test results
EXPOSE WEBSITE http://localhost:8000
FROM vm/ubuntu:18.04
This tells webapp.io what base to run tests from.
RUN curl -fSsL https://deb.nodesource.com/setup_14.x | bash && \
apt-get install nodejs python3 make gcc build-essential \
libgtk2.0-0 libgtk-3-0 libgbm-dev libnotify-dev libgconf-2-4 \
libnss3 libxss1 libasound2 libxtst6 xauth xvfb && \
rm -f /etc/apt/sources.list.d/nodesource.list
This installs all the dependencies needed to run our React E2E Application. For
more information on the RUN
command view the
RUN Documentation.
MEMORY 2G
ENV NODE_OPTIONS=--max-old-space-size=8192
The MEMORY
instruction allows you to reserve memory before you need it. In
particular, languages like nodejs might require memory to be available before
they are used, so we allocate more memory here.
COPY . .
RUN mkdir cypress
RUN npm install
RUN BACKGROUND npm start
The first COPY
instruction copies all the files from your repository into the
Virtual Machine from webapp.io. After copied, we create a cypress directory to
store our results, install the dependencies with npm install
and start our
React app with npm start
. Please note that we use RUN BACKGROUND
here so
that webapp.io can proceed to the next step instead of hanging on the React
start process.
RUN BACKGROUND cd cypress && python3 -m http.server 8000
RUN npx cypress run
The above commands instructs webapp.io to enter the cypress directory and run a
server to display the files on port 8000. After serving, we run the command
npx cypress run
to run our cypress tests.
EXPOSE WEBSITE http://localhost:8000
Finally, the last command exposes port 8000 so we can access our tests in the preview environment.
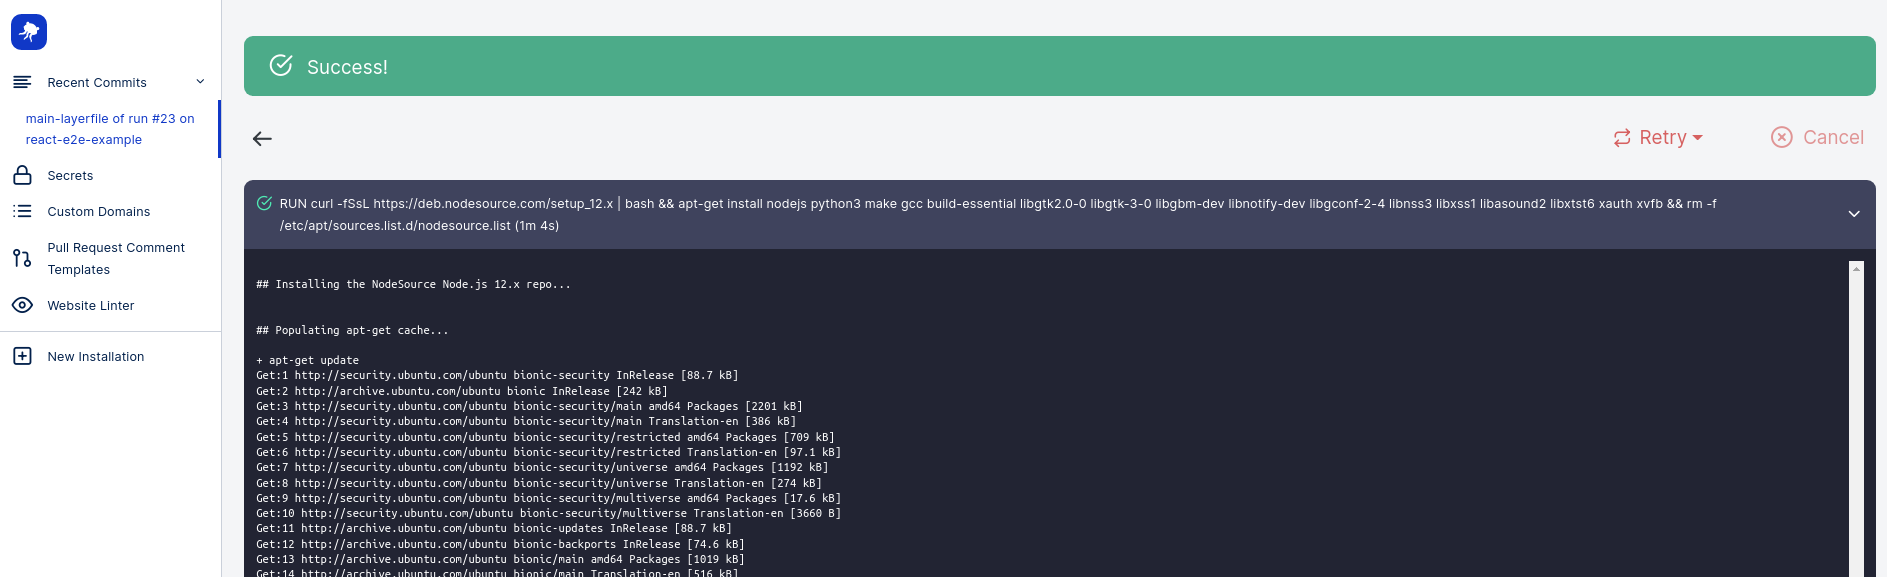
5. Viewing Cypress Results
Now that we’ve understood the Layerfile, simply push a commit from your local repository. After pushing your commit, head over to the webapp.io dashboard to the “Recent Commits” tab where you’ll see a new run starting.

We can click into the Layerfile to view the logs and see the output of each step. Once the Layerfile is finished running, click on the “View Website” button to view the preview environment with the associated Cypress tests.


If we want to improve the developer experience for the filebrowser in our preview environment, we can add filebrowser to our preview environment to display the cypress results. We can use the following Layerfile to do so:
FROM vm/ubuntu:18.04
# Install required dependencies for Node JS
RUN curl -fSsL https://deb.nodesource.com/setup_14.x | bash && \\
apt-get install nodejs python3 make gcc build-essential \\
libgtk2.0-0 libgtk-3-0 libgbm-dev libnotify-dev libgconf-2-4 \
libnss3 libxss1 libasound2 libxtst6 xauth xvfb && \\
rm -f /etc/apt/sources.list.d/nodesource.list
# Install filebrowser
RUN curl -fSsL https://github.com/filebrowser/filebrowser/releases/download/v2.21.1/linux-amd64-filebrowser.tar.gz \\
| tar -C /usr/local/bin -xzf /dev/stdin
# node is a memory hog
MEMORY 2G
ENV NODE_OPTIONS=--max-old-space-size=8192
# Copy the files from GitHub to the VM
COPY . .
# Install dependencies
RUN npm install
# Create a cypress directory & run the React app
RUN mkdir cypress
RUN BACKGROUND npm start
RUN npx cypress run
# Start the filebrowser webserver
WORKDIR ~/cypress
RUN BACKGROUND filebrowser --database /tmp/filebrowser.db --noauth --address 0.0.0.0 --port 9000 --baseurl /cypress
# Start a webserver to view test results
EXPOSE WEBSITE http://localhost:9000
The key differences are the following lines:
# Install filebrowser
RUN curl -fSsL https://github.com/filebrowser/filebrowser/releases/download/v2.21.1/linux-amd64-filebrowser.tar.gz \\
| tar -C /usr/local/bin -xzf /dev/stdin
The above command installs filebrowser.
# Start the filebrowser webserver
WORKDIR ~/cypress
RUN BACKGROUND filebrowser --database /tmp/filebrowser.db --noauth --address 0.0.0.0 --port 9000 --baseurl /cypress
# Start a webserver to view test results
EXPOSE WEBSITE http://localhost:9000
The above commands navigate to the 
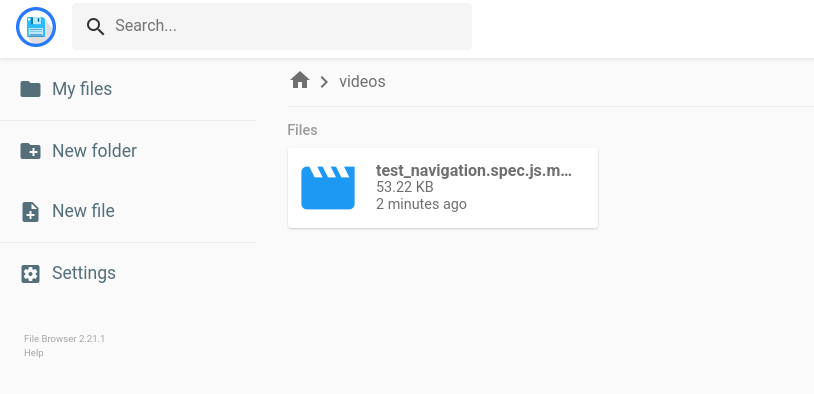
/cypress
directory, run filebrowser on port
9000, and expose the website at port 9000.
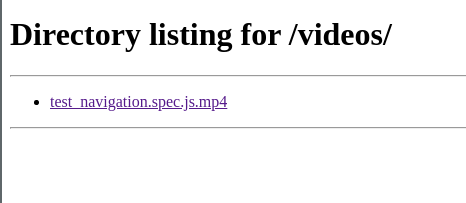
After committing this Layerfile, we’ll get the following developer experience in the preview environment:

For more information on filebrowser, check out their documentation.
6. Running Tests in Parellel
If your project has a large number of tests, it can take a long time for tests to complete running in series on one machine. Running tests in parallel across many virtual machines can save your team time and money when running tests.
This is where the webapp.io SPLIT
instruction comes in. The SPLIT
instruction causes the runner to duplicate its entire state a number of times at
a specific point.
In order to run our tests in parallel and view the associated Cypress test results, we need to set up an account with Cypress and obtain a Cypress record key for our project. You can set up an account and project to obtain a key by going through the following documentation.
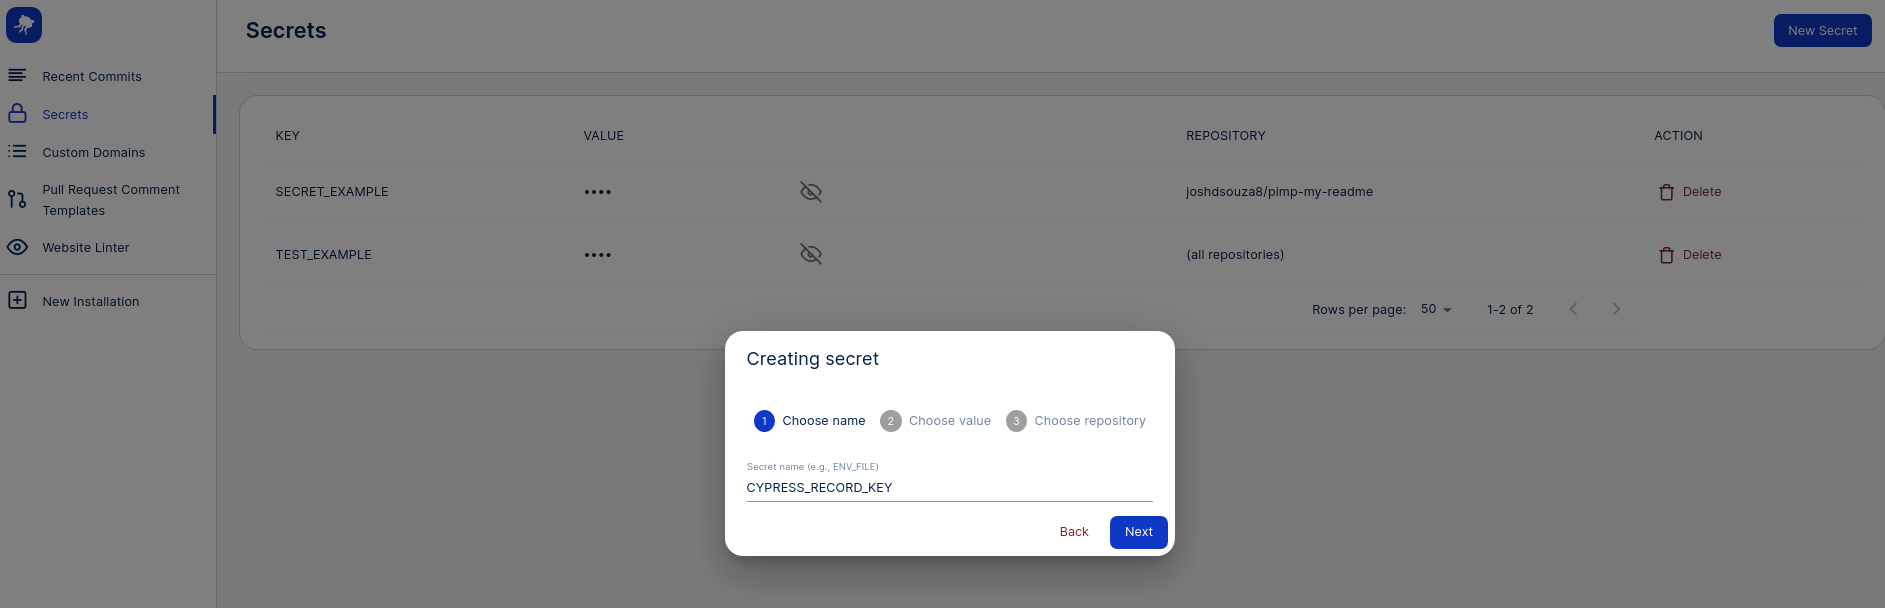
After receiving your project key, add the key to your webapp.io secrets by
navigating to the “Secrets” tab in the dashboard with the following name,
CYPRESS_RECORD_KEY
.

Once the secret is added, create a new file test_correct_title.spec.js
in the
tests
folder with the following content:
describe('It has the correct title', () => {it("Has the correct title for the page.", () => {
cy.visit("/");
cy.get('h1[id="title"]').contains("Cypress example for React");
})}
)
```
This adds a new test to the React sample app that we can run in parellel.
Now, update your Layerfile with the following contents:
```docker Layerfile
FROM vm/ubuntu:18.04
# Install required dependencies for Node JS
RUN curl -fSsL https://deb.nodesource.com/setup_14.x | bash && \\
apt-get install nodejs python3 make gcc build-essential \\
libgtk2.0-0 libgtk-3-0 libgbm-dev libnotify-dev libgconf-2-4 \
libnss3 libxss1 libasound2 libxtst6 xauth xvfb && \\
rm -f /etc/apt/sources.list.d/nodesource.list
# Install filebrowser
RUN curl -fSsL https://github.com/filebrowser/filebrowser/releases/download/v2.21.1/linux-amd64-filebrowser.tar.gz \\
| tar -C /usr/local/bin -xzf /dev/stdin
# node is a memory hog
MEMORY 2G
ENV NODE_OPTIONS=--max-old-space-size=8192
# Copy the files from GitHub to the VM
COPY . .
# Install dependencies
RUN npm install
# Create a cypress directory & run the React app
RUN mkdir cypress
RUN BACKGROUND npm start
# CYPRESS_RECORD_KEY is added in the "secrets" tab of the webapp.io dashboard
SECRET ENV CYPRESS_RECORD_KEY
# Run tests on parallel machines
SPLIT 2
RUN npx cypress run --record --key "$CYPRESS_RECORD_KEY" --parallel --ci-build-id $JOB_ID-$RETRY_INDEX
# Start the filebrowser webserver
WORKDIR ~/cypress
RUN BACKGROUND filebrowser --database /tmp/filebrowser.db --noauth --address 0.0.0.0 --port 9000 --baseurl /cypress
# Start a webserver to view test results
EXPOSE WEBSITE http://localhost:9000
```
Please take note of the following commands:
`SECRET ENV CYPRESS_RECORD_KEY
The above command exposes the secret we added in webapp.io to the virtual
machine, so that we can use it.
```bash
SPLIT 2
RUN npx cypress run --record --key "$CYPRESS_RECORD_KEY" --parallel --ci-build-id $JOB_ID-$RETRY_INDEX
```
The `SPLIT` instruction duplicates the entire runner twice. After duplicating
the runner, we run the Cypress test with the `--record`, `--key`, `--parellel`,
and `--ci-build-id` flags to record our tests for the project and run the tests
in parallel with both machines.
To view the changes in action, commit the Layerfile, and head over to your
[Cypress account](https://dashboard.cypress.io/login) to view the test results
in your project.
<div className="tw-my-4">
<img
className="tw-h-auto tw-w-full"
alt="Sign-Up/Sign-In"
src="https://webapp.io/static/assets/docs/cypress/cypress-parellel.png"
/>
</div>